Understanding the exposure triangle is one of the basics of photography and filmmaking. It’s not tricky, but when you know how aperture, ISO and shutter speed work together to create an exposure, it makes a world of difference to your shooting.
Perfect exposure
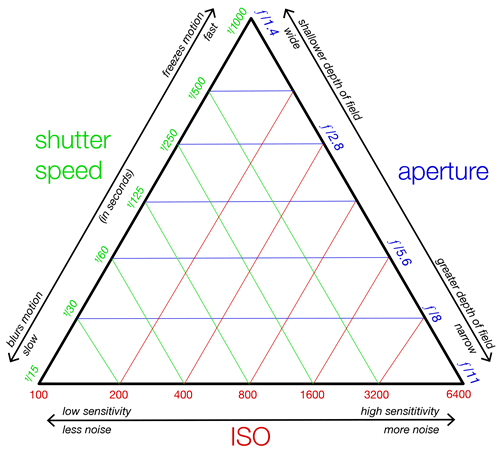
Image by WClarke and Samsara (CC BY-SA 4.0)
Honestly, there’s no such thing as “perfect exposure”: it’s all subjective and depends on the look you want to achieve. Maybe you want something bright and high key and flooded with light. On the other hand, you might want a much darker, more murky scene that is less exposed. Again, it’s all about your story. And while your camera’s light meter might think it knows what a perfect exposure is, you will definitely need to over-expose a snow scene so that it doesn’t turn out grey and dull. But how you get there is all about using aperture, ISO and shutter speed in combination.
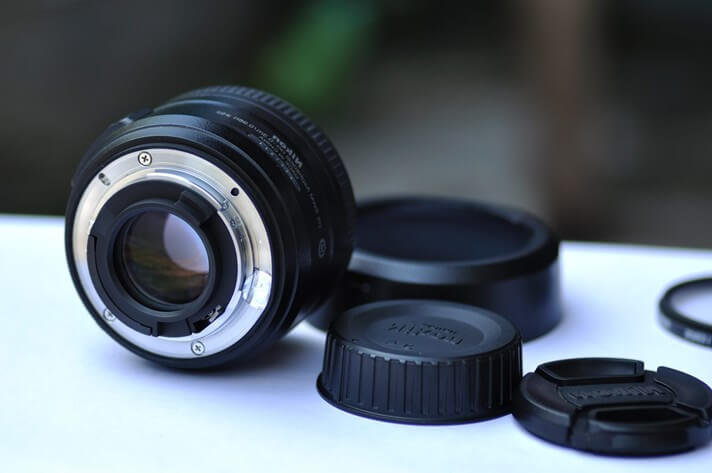
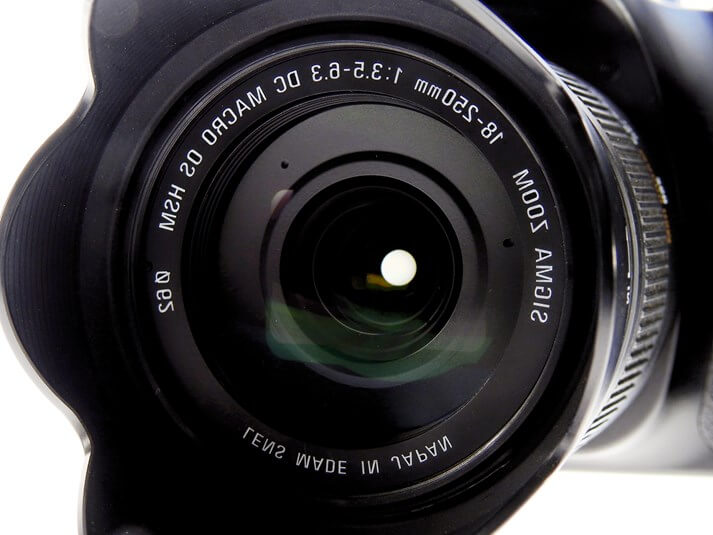
Aperture
Aperture is the first point of the exposure triangle. Aperture means hole, gap or opening. When you talk about lens aperture, you refer to the diaphragm that controls how much light can pass through your lens and reach the sensor. A larger aperture means more light will hit the sensor.
Aperture is measured in ƒ-stops. The smaller the number, the larger the aperture. That means ƒ/1.8 will allow through more light than ƒ/16. While that might seem counter-intuitive, it helps to remember that ƒ-stops are part of a fraction. They denote the relationship between the length of the lens and the physical size of the opening letting through light. For example, if you have a 50mm lens with an ƒ-stop of ƒ/2.0, the actual gap will measure 25mm. Change the aperture to ƒ/8.0, and the opening will measure 6.25mm.
Apart from letting in more or less light, changes to your aperture will also have an impact on your shot’s depth of field. A larger aperture means a smaller depth of field. This gives you a smaller area of your scene in focus and more of it showing as background blur. Decrease the aperture and you give yourself a deeper depth of field with more of the scene in focus.
Learn about this subject more in-depth in our article about how to get your video camera aperture right.
ISO
ISO means how sensitive to light your film or sensor is. When you increase your ISO, you increase sensitivity and help produce a brighter image. However, when you increase your ISO, you also introduce more grain or noise into your images, too. You can think of it as picking up interference: when the receptor is more sensitive, it picks up more of everything, not just the one thing you need it to detect.
Check out our article about camera ISO to understand how to choose the right ISO for your video.
Shutter speed
In photography, you can use a slower or faster shutter speed (sometimes called exposure time) to let more or less light reach the sensor. While slower shutter speeds let in more light, they also capture more motion blur in a scene and can show up camera shake, too. If you want or need motion blur in a shot, that’s great, but it creeps in sooner than you think. And as for camera shake, you can get around that with a video tripod. The handy rule here is to use a tripod anytime your shutter speed dips below your lens’ focal length. So if you’re shooting with a 100mm lens and a shutter speed of 1/50 second, use a tripod.
When it comes to filmmaking or videography, you don’t have so much flexibility with your shutter speed because it will be determined by your frame rate. To make a video with a frame rate of 30 frames per second (fps), your shutter speed will need to be 1/60 second. For filmmaking, you are much more reliant on aperture, ISO and the light–natural, artificial or both–that’s on your scene.
Check out our article about shutter angle and shutter speed to learn more about this subject.
Understanding the exposure triangle in photography
By adjusting the 3 elements of the exposure triangle, you can create the perfect exposure. That is, you let the right amount of light reach the sensor for the correct amount of time to produce the image that you want. Should you need to make your image brighter, you can use a larger aperture, a higher ISO, a slower shutter speed or a combination of 2 or 3 of the elements to achieve it. For a less bright image, you can try a smaller aperture, a lower ISO, a short shutter speed, or adjust 2 or 3 of them together.
If you’ve got the right exposure in terms of brightness but need to make a creative adjustment, you can compensate for altering one by moving one or both of the others in the opposite direction. To maintain a consistent exposure, you can give with one element–say aperture–and take from one or both of the others.
When you’re shooting on a sunny day but want a shallow depth of field, you will need to set the ISO as low as it will go and use a very fast shutter speed to accommodate the large aperture that gives you the depth of field that you want. If the image is still over-exposed, try using a neutral density (ND) filter to block out the excess light.
For dimly lit scenes where you need lots of the scene in focus, you will need to use a slow shutter speed and a high ISO to accommodate the small aperture.
Understanding the exposure triangle in filmmaking
When it comes to filmmaking, just because the shutter speed parameter is fixed, it doesn’t mean that the exposure triangle is no longer important. You will still need to adjust your aperture and ISO in order to achieve the exposure that you need. However, you will also need to pay much more attention to the light that is falling on your scene, whether it is natural or artificial. Perhaps you will need to increase the intensity of the lights for a brighter exposure or use an ND filter if things are too bright.
Back to that “perfect exposure”
The best way to learn about the exposure triangle is to actually experiment with it. Let’s take the photography triangle first. Start with the ISO side of the triangle. Set it as low as possible. Now think about what depth of field you want and choose an aperture that reflects that. To get the exposure you need, what will the shutter speed bit of the triangle have to be? Can you work with that or will you have to make adjustments to either the ISO or aperture to help? Do you need to adjust the lighting to help you more?
When it comes to the filmmaking triangle, you’ll need to set the shutter speed first so that it accords with your frame rate. Now dial in your aperture and ISO to get the exposure you need. Do you get the look you want? Or will you need to introduce more light or have to block some out?
The thing to remember with the exposure triangle is that it’s about give and take. If you need another stop of exposure, you can dial it in with a bit of everything, a half-stop of 2 elements or 1 stop of 1 element. If you’ve got the perfect exposure but need to adjust the aperture by a stop for a deeper depth of field, you can maintain the correct exposure by increasing the ISO by a stop. Push and pull. Give and take.