![]() A nice animated logo can go a long way in terms of signaling the quality of your videos before viewers even get to the main content. And when you add 3D into that equation in a way that isn’t cheesy, it can take that perceived production value to another level entirely. For you Apple Motion users out there who’d like to create a nice animated 3D logo, but who think it might be too tedious or time-consuming, the good folks at Ripple Training have something that will help you out immensely. So without any further ado, here’s Mark Spencer and Steve Martin to show you an incredibly powerful Motion hack that will take your 3D logo animation skills to the next level.
A nice animated logo can go a long way in terms of signaling the quality of your videos before viewers even get to the main content. And when you add 3D into that equation in a way that isn’t cheesy, it can take that perceived production value to another level entirely. For you Apple Motion users out there who’d like to create a nice animated 3D logo, but who think it might be too tedious or time-consuming, the good folks at Ripple Training have something that will help you out immensely. So without any further ado, here’s Mark Spencer and Steve Martin to show you an incredibly powerful Motion hack that will take your 3D logo animation skills to the next level.
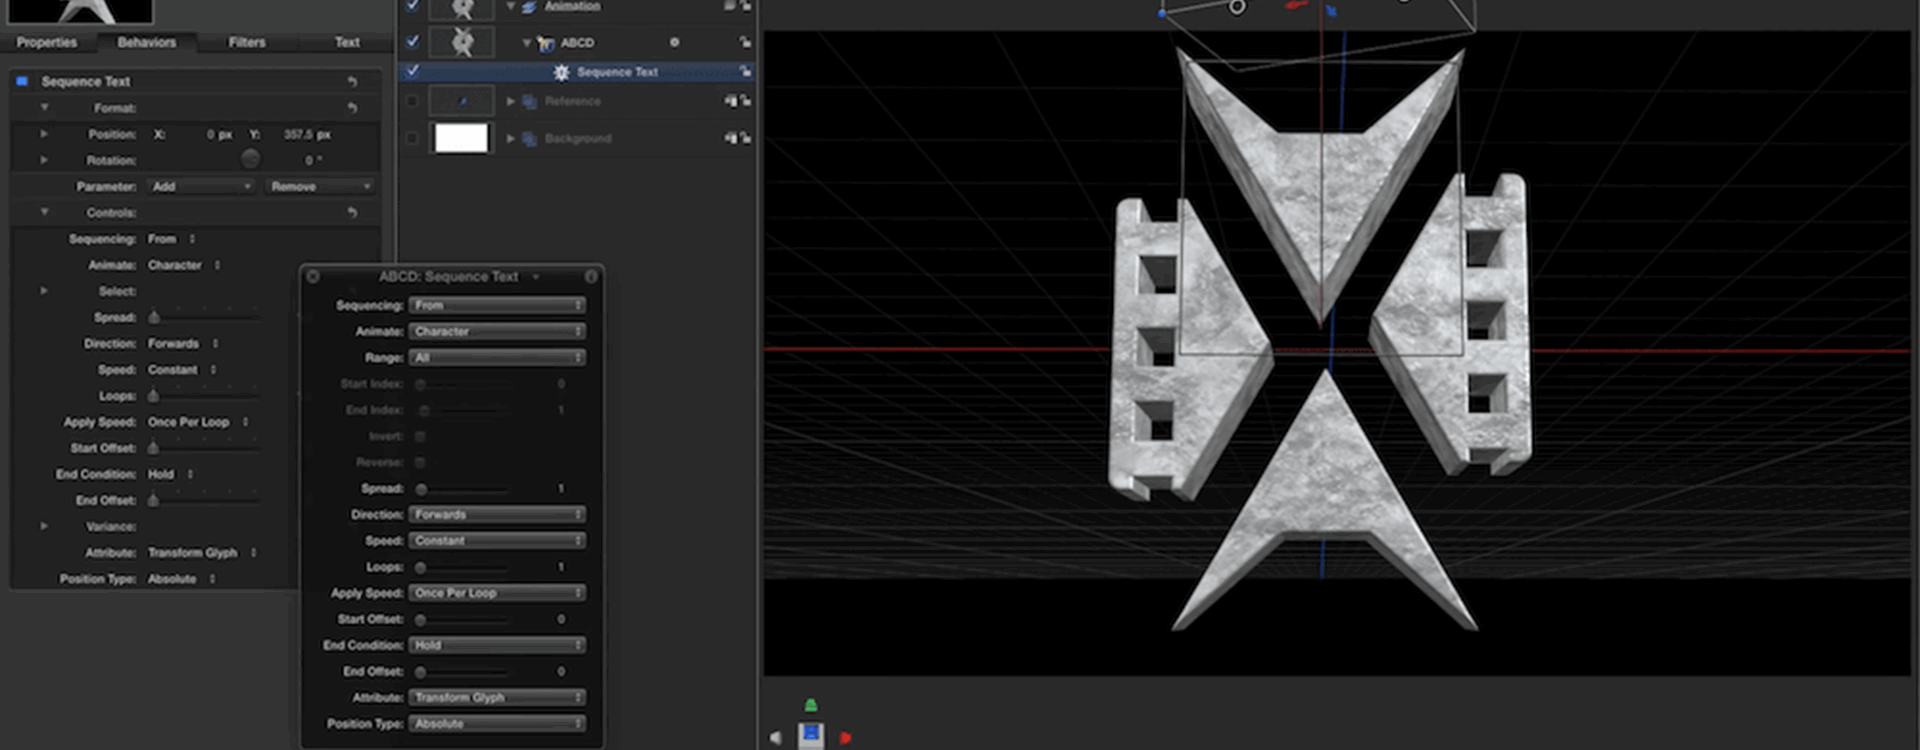
The trick in this 3D logo animation tutorial is that you’re basically using Motion’s powerful 3D text engine on non-text objects. The benefit of doing this is that it makes it so much easier (when you use one text layer in Motion) to make smooth, seamless 3D animations. However, in order to take advantage of this, you have to create a customized font that is made up of the individual parts of your logo. There are plenty of ways to create your own fonts these days, but in this video, Mark uses a cool service called Glyphter that’s really simple and intuitive (and free!). In order to make your font work on Glyphter, you just need to create SVG files for each part of the logo you’d like to animate, and then the service will create a font for you. Here’s Mark to share what to do next once you’ve got your font prepared:
Once created and installed in FontBook, the font is available to be applied to a text layer in Motion. Since I assigned each graphic to the first 4 letters of the alphabet, all I need to do is to select the Text tool, select the custom font in the Heads Up Display, then click and type “ABCD” in the Canvas. [Then] we need to rebuild the logo by moving each part to the right location and making it the right size. I imported a copy of the original logo as a reference, then I use the Adjust Item tool (only available when a text layer is selected) to move, rotate and scale each glyph independently. Once the logo is assembled, I enable 3D text in the Inspector, and have some fun choosing materials, lighting, depth, and more. And by adding a camera I can quickly create a dramatic framing.
And that’s really it! Instead of having to use individual layers for each element of your logo, and manipulating/animating each one individually, you can save tons of time by having Motion treat the logo as a single text layer. This also means you can take advantage of Motion’s cool Sequence Text behavior and use the nifty presets that come along with it.
Now, in an ideal world, Motion would have this functionality built into it so that wasn’t necessary to trick the software into treating objects as 3D text. This may happen soon to match After Effects’ improved 3D workflow. Regardless, it’s still a very cool hack that can potentially save you a lot of time and energy.
[via Pro Video Coalition]