Artlist just launched the all-new AI voiceover for video creators. Now, it’s faster than ever to create engaging voiceovers for your videos with voices exclusive to Artlist. Creators like Josh Adrift already love it — he shot this incredible ad from scratch using Artlist assets and AI voiceover. Get inspired and learn how to make your own.
Creating the ad
Josh started by choosing his product — his trusty headphones, an essential for most creators. He was very curious to see if the new Artlist AI voiceover could sound crisp and realistic.
On location, Josh wanted to play around with the light and see how he could get creative. He started with a mood board which is always a good idea to plan and organize your vision ahead of a shoot. Choosing the music before the shoot really helped him to create an established vision and mood.
Check out the Artlist song Josh picked:
This song is very chill and ambient, which left him a ton of room for a voiceover and sound effects. It was also a great baseline to start experimenting with and generating a range of voiceovers, which helped bring the audio element of the shoot together.
The bulk of the decisions were made in pre-production, so the actual shoot was fairly straightforward. Josh ticked off his shot list, which included some mounted shots to pull the product into the video and orbiting shots that captured the hero in its element. He also shot some close-ups to add interesting textures to play with in the edit.
The light on set was great and left room for him to experiment a bit. Josh said, “As long as you’ve got all the shots marked out on your storyboard, you should be good to go for the edit.”
Post-production with Artlist AI voiceover
Inspired by the music choice, Josh wrote the voiceover script. It’s never been easier to create voiceovers. Simply browse the Artlist voiceover catalog of exclusive voices and choose one that feels right for your video. There’s a load of different voices in the catalog, so feel free to experiment until you find one that fits. Some of the options Josh considered included Edge (raw and powerful), Esteem (warmth and wisdom), and Candid (raw and authentic). In the end, Josh chose Serenity, a soothing and calming voice and exactly the vibe he needed.
Once he chose the voice, Josh simply added his script to the voiceover generator and created professional-quality narration in minutes. Without AI voiceover, this process would have involved hours of recording and editing. Essentially, he was able to cut down the process from weeks to minutes.
Using the voiceover audio settings
The new Artlist AI voiceover is designed for experimentation. Above the text box in the right-hand corner, you can click on the Voice Settings button, which will open a few sliders. You can change the Emotional Range from Flat to Expressive, the Similarity to original voice from Similar to Less similar, and the Style boost from Low to High.
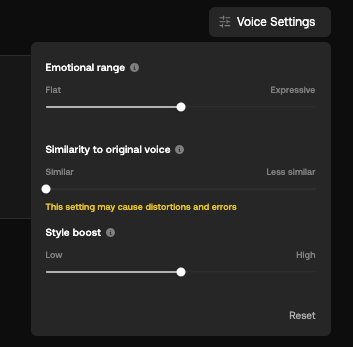
- Emotional range: A more expressive emotional range will result in less consistency between generations.
- Similarty to original voice: Higher similarity will make the voiceover better match the original voice.
- Style boost: A higher setting will exaggerate the style of the original voice.
By playing around with all three of these sliders in different combinations, you’ll notice how different the results can be, tweaking the cadence and feel of your voiceover. See for yourself:
Next, Josh added the voiceover he generated to his editing timeline to chop it up and fit the timing of his footage and the song. This resulted in it being a bit more spaced out, perfect for that calm, soothing vibe he was looking for.
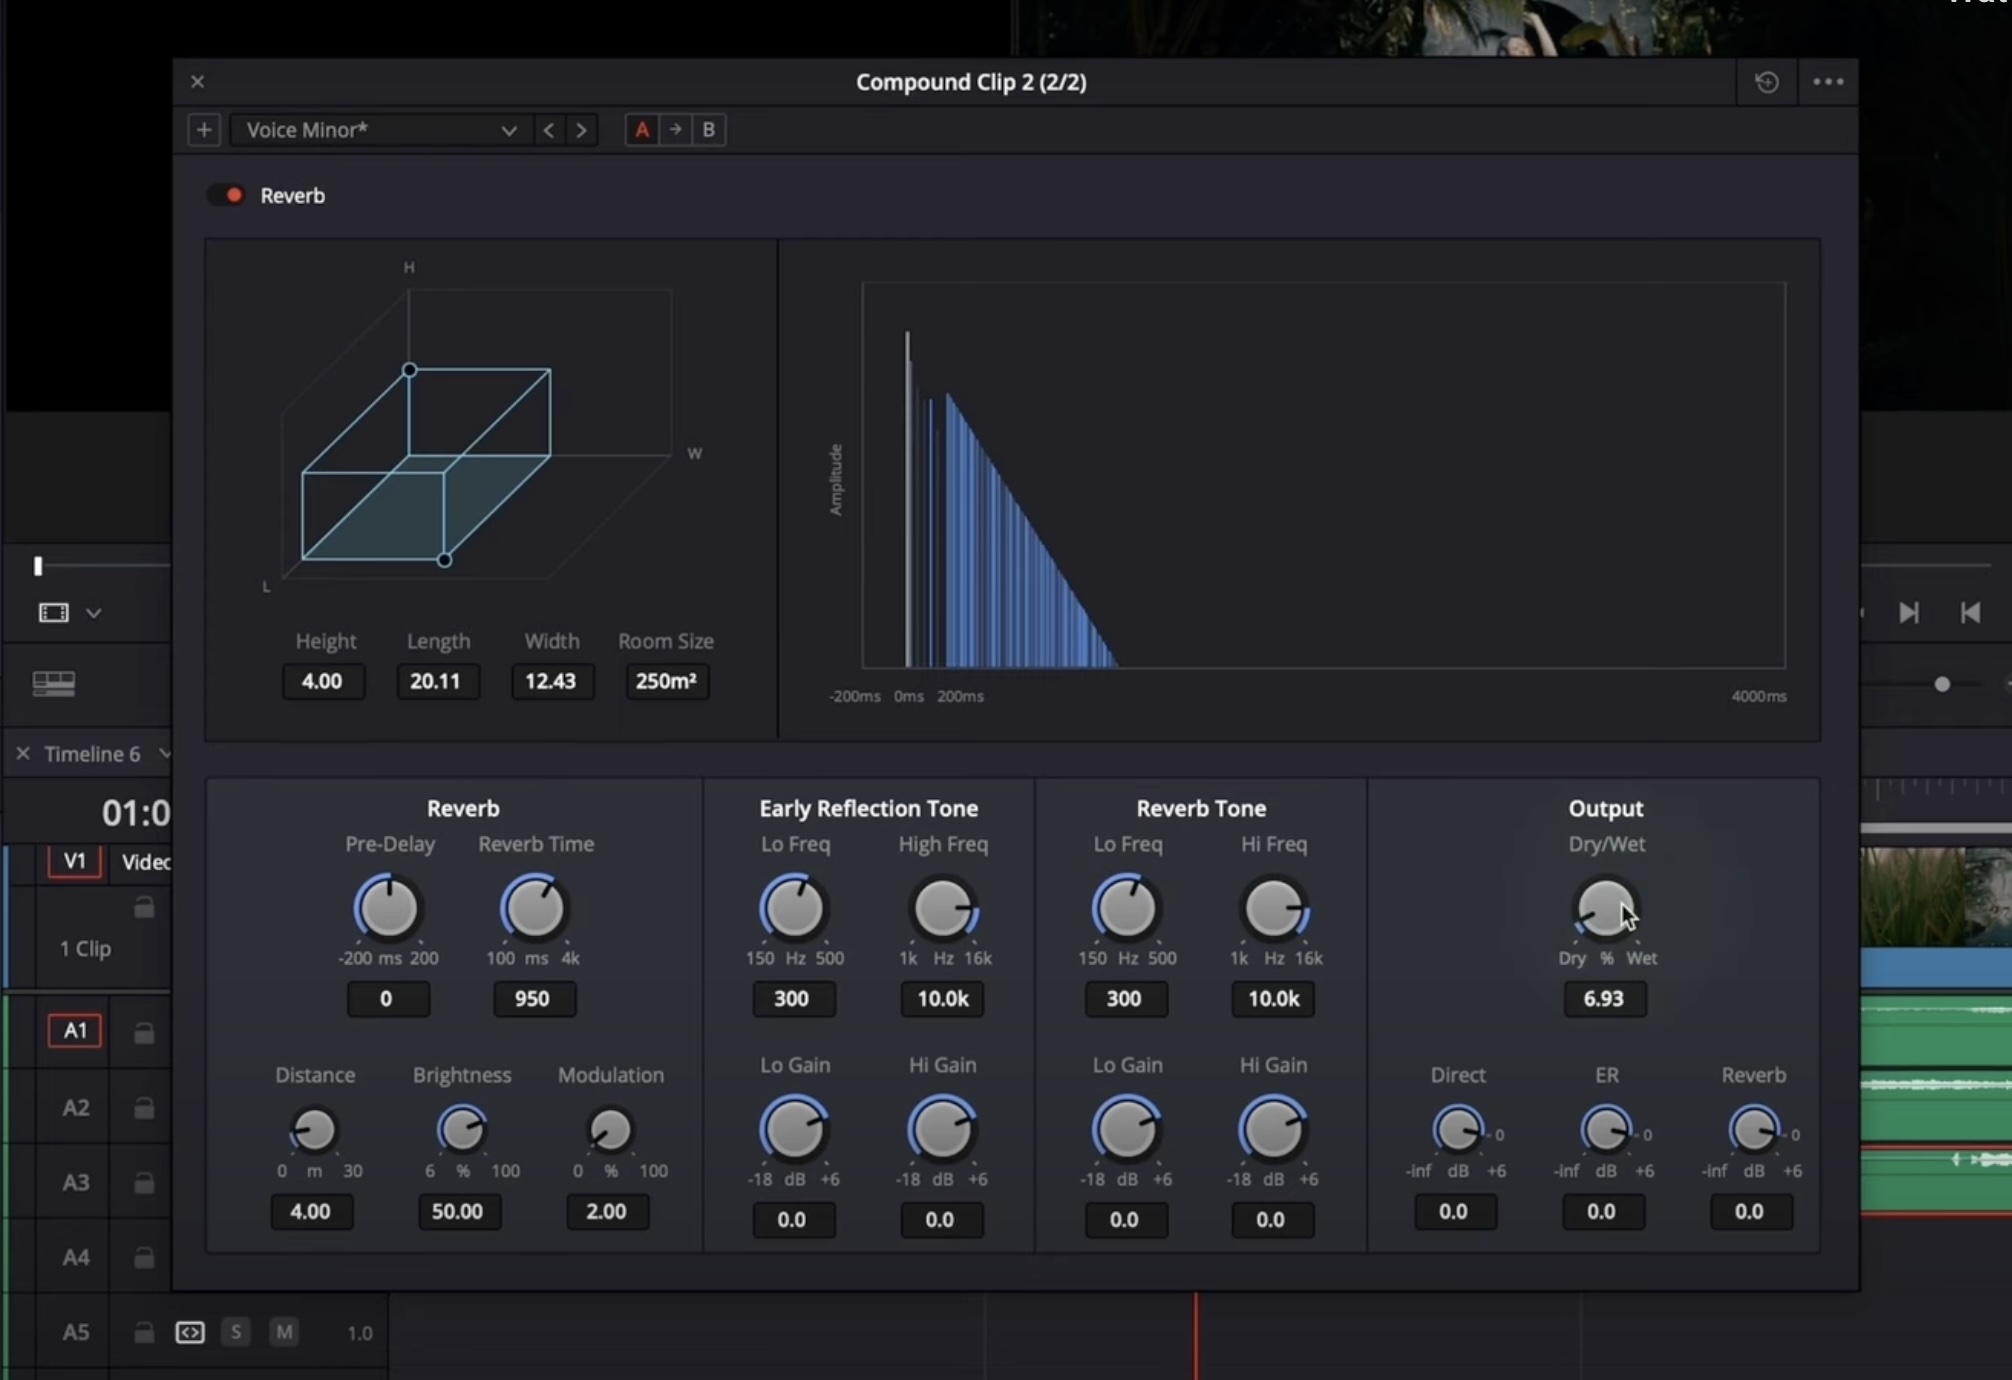
Once the timing was just right, Josh added a reverb filter. He used a preset that he had previously created for himself. You can copy the attributes below or custom-make your own.
Wrapping up
It’s safe to say that Josh was overall impressed with the output from Artlist’s new AI voiceover tool. He said, “It was really cool to see how effective that could be. Not only do we have this incredible new tool we can add to our belts, but it’s all in one place.”
So why not try AI voiceover for yourself and see how it elevates your storytelling and helps your content stand out?
Did you find this article useful?


