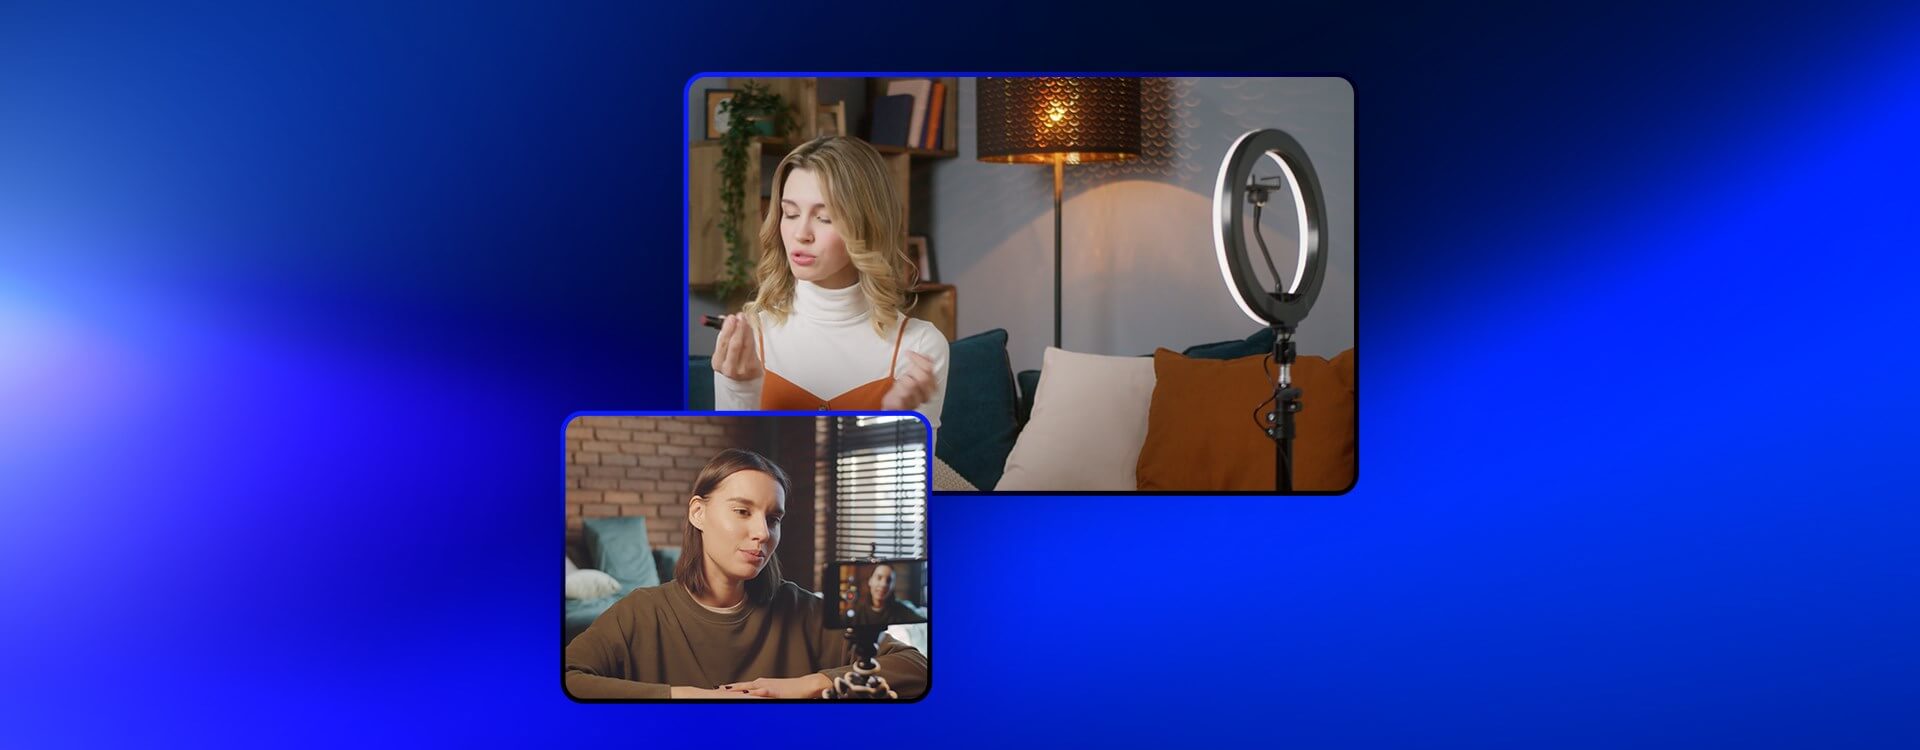
Introduction to vlog lighting
Lighting can make or break a video, and if you’re a vlogger trying to build up a following, the key thing is to keep it professional-looking and consistent. You might think that you have to spend a small fortune on your vlog lighting setup, but the truth is that you can do an excellent job at a very modest cost. Here are 6 vlog lighting setups that will help you get a handle on what you need to do.
Should I buy lighting gear?
If you’re wondering if you really need dedicated lighting for vlogging, the short answer is, no, you don’t. There is no reason why you can’t light a vlogging setup with lights that you have around your home. If you’re looking for a homespun or cutesy vibe, using a mixture of table lamps, standard lamps and fairy lights will work to your advantage.
But the longer answer is that for a reliably consistent vlog lighting look that gives you lots of versatility, buying lighting gear will be your best option. Even then, just investing in one light will help to elevate your YouTube lighting setup dramatically.
Using 1 light
If you only have money to spend on 1 light for a vlogging setup, the best option is probably a ring light.
Advantages of a ring light
- Inexpensive
- Simple to set up
- Provide an even spread of light across your scene
- Reduce ugly shadows
- Produce attractive catchlights in your eyes
Ring lights are very straightforward to use: they are positioned around your camera. You can pick up ring lights for very cheap. Still, by spending just a little bit more, you can buy lights that offer you color temperature options and variable intensity.
Using 2 lights
A 2-point lighting setup requires a key light and a fill light. The key light is your main light source for the scene, while the fill light is there at a lower intensity to balance out the shadows. If you’re struggling for the 3rd light for a 3-point lighting setup, then try 2. Just be warned that it can make it look as if you’re floating against a dark background if you’re not careful!
A good use for a 2-light setup is if you want a backlighting configuration, but not necessarily a silhouette. By balancing the backlight with a fill light, you can maintain the halo effect but not plunge your face into shadow if you’re the vlogger.
For a 2-point lighting setup, you might wonder about softbox vs. umbrella lighting. Which is best? There’s no definitive answer: some people prefer umbrellas for their enormous spread of very soft light, while others opt for the greater control, but still softness, of the softbox. More important than whether or not you want umbrellas or softboxes, make sure that you know the difference between hard vs. soft lighting.
When it comes to high-key versus low-key lighting, you might find that 1 light source is more than enough for a low-key setup. For example, perhaps you’re shooting at night and using a street light as the key light. For high-key lighting, using 2 lights with the fill light at half the intensity of the key light and bright white walls for all the light to bounce off is perfect.
The 3-point lighting setup
The 3-point lighting setup is the stalwart of any photography or filmmaking studio. It is relatively simple to configure but is versatile and flattering. If you’re trying to make your name vlogging, then it will add the necessary polish to your videos, too.
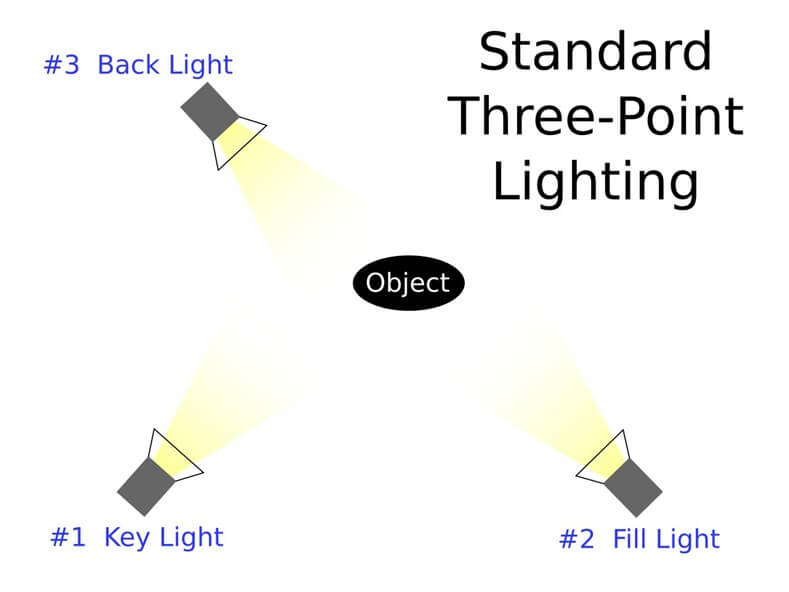
A 3-point lighting setup consists of 3 lights: the key light (or main light), the fill light (there to lift the shadows) and the backlight, which lights the subject from behind and brings some separation to the scene. The backlight is sometimes called the hair light or rim light.
You set it up with the key light at 45º from the camera, either left or right, at eye level with the subject. The fill light sits on the other side of the camera at the equivalent angle and height of the key light. As a general rule, the fill light is at half the intensity of the key light. However, it isn’t essential to use an actual light for the fill light; sometimes, a reflector will do the job. Finally, the backlight, sitting on the same side of the camera as the key light, but behind the vlogger and toward the camera.
A softbox lighting setup is probably a versatile option for 3-point lighting so that you can be assured of lovely soft light but with the ability to direct it. Do take a look at a Fresnel light, too. The ability to switch between spot and floodlighting is very useful.
Sunlight
Sunlight is free and definitely a source of light not to be overlooked. The easiest way to use sunlight is to face into a sunlit window while you are recording. But you do need to remember that the color temperature of sunlight changes throughout the day. So it might be a good idea to always film at roughly the same time to ensure a consistent color look.
You can make even better use of natural light by introducing some light modifiers, which will go a long way to helping you gain a consistent and professional look. For example, a reflector can bounce light back onto a scene, acting as a fill light to reduce harsh shadows. A scrim or diffuser can soften sunlight that’s a bit too harsh. These work both indoors and outdoors, so don’t worry about setting up a reflector inside or a scrim outside.
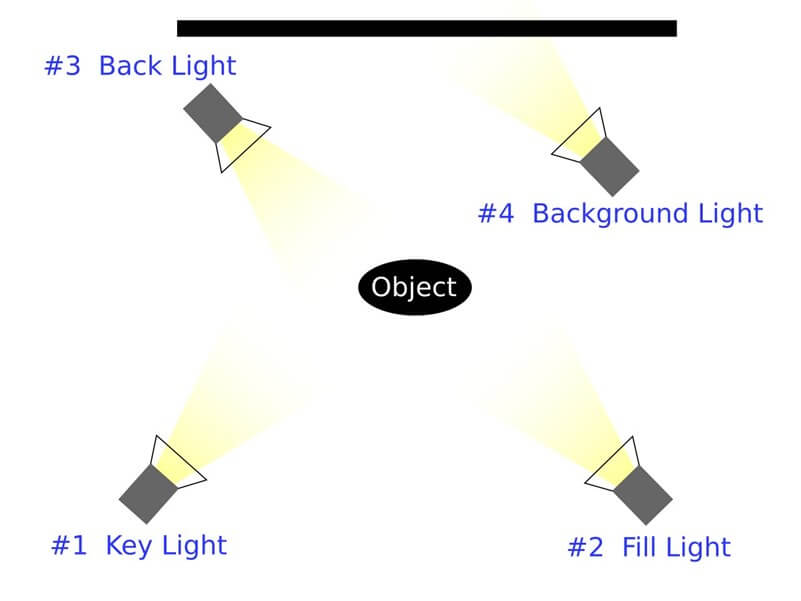
A 4-point lighting setup
A 4-point lighting setup has the same basis as a 3-point lighting setup–key, fill and backlight–with the addition of background light. This is a light used specifically to bring light to the area behind you, the vlogger. This 4th light helps to create some separation between you and the background, but you can also use it for some interesting effects. For example, you might light a pattern on the back wall using a gobo or use a small light to add a splash of color to the background. Yes, it’s a more intensive vlog lighting setup than the others, but it can really bring you some distinction from your competition.
Wrap up
The vlog lighting setup that works for you is the one that’s best for you. Maybe it’s natural light with some reflectors, or perhaps it’s the 3-point lighting setup. Just remember that your viewers will expect the same level of professionalism for each video, so make lighting a priority!