
If you’ve ever seen images with strange, mixed-up, glowing colors that feel completely surreal, you might be looking at an infrared (IR) image. IR images can be captured using an IR pass filter over your lens, but their long exposure times make that method tricky for video. But, it can be done!
What is infrared light?
Let’s start by establishing what IR light is. Light comes in a spectrum of wavelengths. Some we can see–called visible light–and some, such as infrared and ultraviolet, that we can’t. Visible light ranges from violet at about 400 nanometers (nm) to deep red, which measures roughly 750nm. IR picks up where deep red stops at 750nm and runs to about 1 millimeter. IR light is divided up into different regions, and near IR, which is what we’re interested in, runs from 750 to 1,000nm.
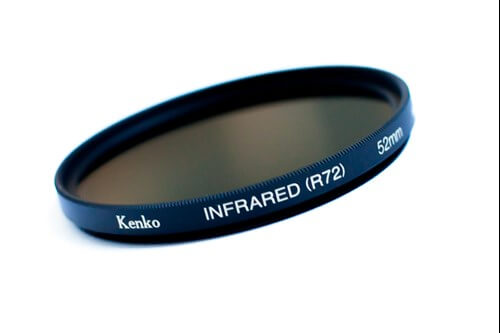
While the human eye might not be able to detect IR light, camera sensors can. However, images can appear distorted if too much IR light is recorded alongside visible light. To prevent this, cameras are fitted with IR blocking filters, sometimes called “hot mirrors”. But, these IR blocking filters are not 100% effective, and you can capture IR images using an IR pass filter. These filters block out visible light and just let the IR light through to your lens.
By blocking out visible light, IR pass filters require very long exposure times, which wouldn’t necessarily work for filmmaking. But, if you have your camera’s IR blocking filter removed and replaced with an IR pass filter, you can have a go at IR filmmaking.
Modding a camera for infrared filming
Removing the IR blocking filter from your camera is a big deal. Most of the time, it cannot be reversed, and it will void your camera’s warranty, so you’re best doing it with an old camera that you would otherwise sell or one that would just sit on a shelf unused. I’d also recommend sending it to a company that professionally converts cameras for IR use.
If you do want to try it yourself, remember that you will need to replace the IR block filter with an IR pass filter. No filter at all will result in soft images because the camera cannot focus effectively. There are 2 ways to do this. First, you can always place a camera filter over your lens. This gives you lots of flexibility because you can select the exact filter type and strength you want, but it could be very expensive.

Second, you can select an IR pass filter to be permanently fitted where the hot mirror used to be. There are several choices here.
How to choose the right IR filter
A 720nm IR filter is best for black and white filmmaking because it lets through very little visible light. By choosing a 680nm or 590nm IR filter, you will allow a little visible light into your images. While this won’t make a “wholly infrared” video, the addition of a little visible light gives you much more flexibility when it comes to color correction, and you can create much more dramatic looking footage. You can still have black and white, too.
Straight out of the camera, a 590nm filter will look mostly red if you use auto white balance. With custom white balance, the sky is a pale pinky-brown with bright white clouds. Foliage looks like a bold cyan.
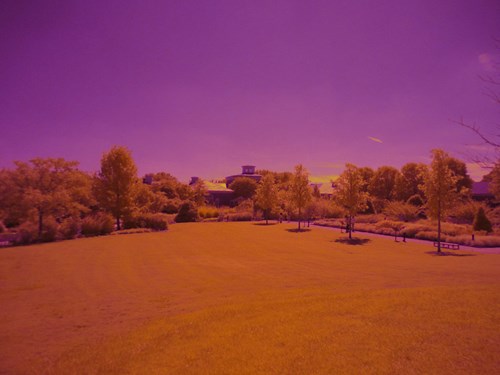
Image by Eli Christman CC BY 2.0
Footage shot with a 680nm IR filter will also look red straight out of the camera if you used the auto white balance setting. If you use a custom white balance, then the sky will appear brown-grey, foliage a pale cyan, and clouds will be bright white.

After you’ve tweaked things in post-processing, your images can look very different indeed.
Shooting an infrared video
To give yourself the most control over your video, shoot fully manually and in RAW. You will get the best results shooting an IR video on a bright, sunny day. However, IR video is very susceptible to flares, and you cannot recover blown highlights, either. Make use of lens hoods and err on the side of under- rather than over-exposing your work. It’s recommended to shoot using a tripod or other stabilization device, too.
Whenever you shoot an IR video, you will need to engage in extensive post-processing to get the look that you want. To help with the color correction, it’s a good idea to shoot a grey card before you start to accurately set the white balance.
After that, get out and shoot!
Post-processing your IR video
You will need to process your video files in software like Adobe Premiere Pro. When you open the files of your infrared video, the chances are it won’t look anything like the infrared images you’ve seen shared elsewhere. You’re going to have to adjust it and tweak it quite a bit to get what you might think of as the “infrared look”.
- First, adjust your white balance according to the grey card that you shot.
- Next, reverse the channels, switching around red and blue. In the red channel, reduce red to 0 and increase blue to 100. In the blue channel, set red to 100 and blue to 0. You can adjust the red and blue in the green channel to 50, too.

When you reverse the channels on an image shot with the 590nm filter, the pinky-brown skies will turn a startling blue, and the bold cyan foliage turns golden-orange. The white clouds stay bright and bold.

The 680nm IR filter gives you a toned-down version of the blues and golden oranges from the 590nm version.
Don’t forget, you can always experiment with your adjustments to get the look that you want for your dream or nightmare scene or something that is completely out of this world!